Render serves as a protective and decorative layer on the exterior of buildings, enhancing their appearance while shielding them from weather damage. However, over time, render can develop cracks, chips, and other imperfections due to various factors. Render patch repair is a cost-effective solution that targets these damaged areas, restoring the surface without the need for a full re-render.
By addressing minor render issues early, you can prevent further damage and maintain the structural integrity and visual appeal of your property. This guide explores the causes of render damage, the repair process, and tips to ensure a durable and seamless finish.
What is Render Patch Repair?
Render patch repair involves fixing damaged or deteriorating sections of render to restore the wall’s surface. Instead of removing and replacing the entire render, only the affected areas are treated. This approach not only saves time and money but also prolongs the life of the render by preventing further deterioration.
Patch repair ensures that the new render blends seamlessly with the existing surface, maintaining both the appearance and protective function of the wall. It is a practical solution for repairing small cracks, peeling, or minor surface damage without the need for extensive rework.
Common Causes of Render Damage
Understanding the root causes of render damage is essential for effective maintenance and timely repairs. Several factors contribute to the deterioration of rendered surfaces, including:
See also: Charles Stanley House: Take a Peek Inside the Beautiful Charles Stanley House
Weather Exposure
Constant exposure to harsh sunlight, heavy rain, wind, and fluctuating temperatures can weaken render over time. UV rays break down the surface, while moisture penetration can lead to cracking and bubbling.
Structural Movement
Buildings naturally expand and contract due to temperature changes, causing small movements that put stress on the render. This often results in minor cracks that can worsen if left untreated.
Moisture Ingress
Moisture seeping into the wall behind the render can cause bubbling, peeling, and discolouration. Prolonged exposure to damp conditions can weaken the bond between the render and the wall, leading to further damage.
Poor Initial Application
Improper application techniques or the use of low-quality materials can compromise the durability of the render. If the surface wasn’t adequately prepared or the render was applied too thickly or thinly, it may not adhere properly, resulting in cracks and peeling over time.
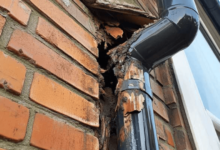
Impact or Physical Damage
Accidental knocks, drilling, or physical impacts can cause visible cracks or chips in the render. Even minor damage can escalate if not addressed promptly. For situations where damage is caused by external factors, render patch repair can effectively restore the surface and prevent further deterioration.
Signs That Your Render Needs Repair
Cracks and Hairline Fractures
Small cracks are an early warning sign of potential damage. While hairline fractures may seem minor, they can allow moisture to penetrate and lead to more extensive issues.
Bubbling or Peeling Render
Bubbling or peeling indicates that the render has lost its bond with the surface, often caused by trapped moisture or poor adhesion. This requires immediate attention to prevent further deterioration.
Discolouration or Staining
Dark patches or white salt deposits (efflorescence) are signs of moisture ingress. Discolouration indicates that water is seeping behind the render, potentially causing further damage.
Damp Patches or Mould Growth
Visible damp patches or mould growth are indicators of prolonged moisture exposure. If left unchecked, these issues can compromise the structural integrity of the wall.
How is Render Patch Repair Done?
1. Assessment and Surface Preparation
The first step is to inspect the damaged area and determine the cause of the damage. Loose or deteriorating render is carefully removed, and the surface is cleaned to eliminate dust, dirt, and debris.
2. Priming the Surface
A bonding agent or primer is applied to the cleaned surface to ensure that the new render adheres properly. This step is particularly important if the original render has lost its bond with the underlying surface.
3. Applying the New Render
The appropriate type of render is chosen to match the existing surface. The new render is applied in thin layers to build up the surface and restore its integrity. Depending on the finish, the surface can be smooth or textured to match the original render.
4. Blending and Finishing
To achieve a seamless look, the new render is feathered and blended with the surrounding surface. This ensures that the repaired area blends in perfectly, making the patch repair virtually unnoticeable.
5. Curing and Painting
The repaired section is allowed to cure for 24-72 hours, depending on weather conditions. Once the surface is fully cured, it can be painted or sealed to enhance durability and maintain a uniform appearance.
Final Words
Render patch repair is a practical and cost-effective way to restore damaged render, enhancing the appearance and durability of your property. By addressing minor damage early and ensuring proper maintenance, you can prevent costly repairs and extend the lifespan of your rendered surfaces.
For extensive or complex repairs, hiring a professional ensures that the repair blends seamlessly with the existing surface and maintains the structural integrity of your property. Taking a proactive approach to render maintenance will keep your walls looking their best for years to come.